things for pinning and magnetizing
Posted: Thu Sep 09, 2010 12:47 pm
OK, here's what you need for pinning, magnetizing, and generally prepping a mini:
1) tools.
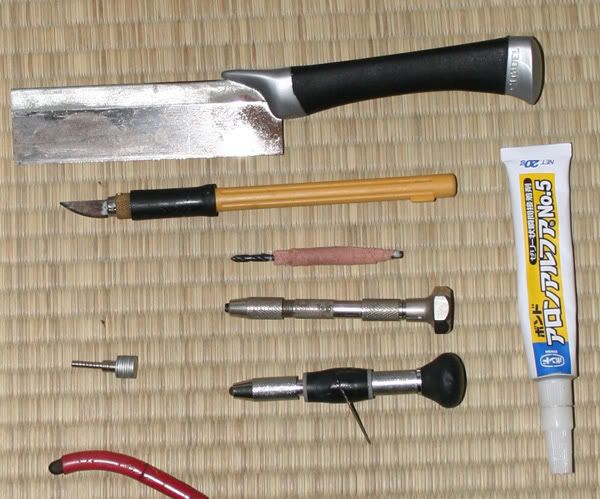
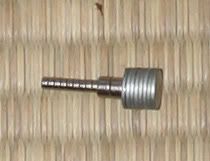
saw, knife, big drill (with elastoplast handle), small drill handle (there are 2 here. 1 is fine.) small drill bit (propped up on the drill handle), superglue, magnets.
magnets. The smaller chunky round ones are the ones I got from Rakuten. the bigger chunky ones I got at school, and the big flat ones I got from some 100yen shop butterfly decorations.
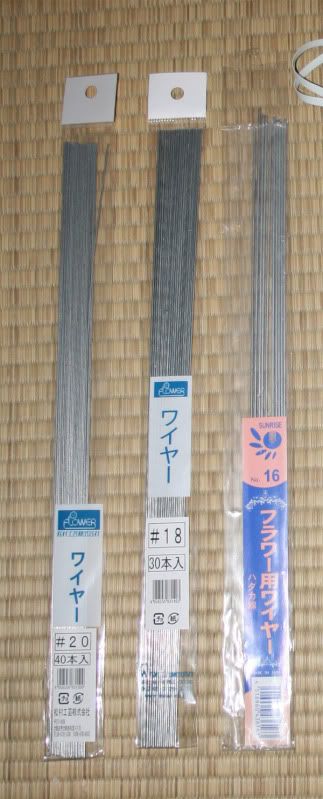
florists wire, bought from girly craft shop (sewing, knitting, and, crucially, flower arranging)
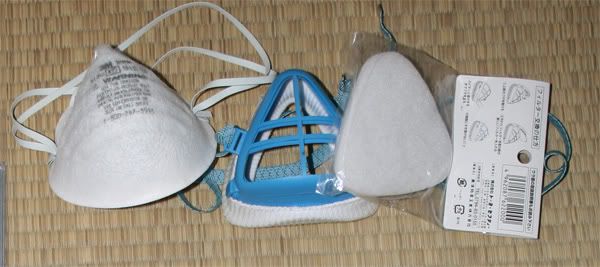
masks, if you intend to work with resin and/or an airbrush.
To get a really strong, yet removable join, (double-pin-magnet) do the following:
1) use a big drill, slightly larger in diameter than your magnets, to drill a hole in one of the parts to be joined. Right in the middle is best. Put a little blu-tac on the other part to be joined, wet the exposed side to avoid stickage, and press the two parts together as best you can. When you move em apart there should be a sticky-outy-bit in the blu-tac. Drill the partner hole here. Once both bits have had a hole drilled to the correct depth to fit the magnets, superglue a magnet in each hole. You'll find that this will hold a regular 28mm mini's arm, but will struggle to hold a big wing on something.
Onto stage 2:
2) about 3~4 mm from the magnet, drill a small hole to fit your regular pinning wire. e.g. a paperclip or florist's wire. Use the blu-tac technique to align and drill the partner hole. Now you have a hole and a magnet in each half of the join. Cut a piece of wire to fit, dry-fit it, and then glue it into one side only. Repeat step 2 for another wire/set of holes on the opposite side of the magnet (see pic). Make sure the pins are both in the same part.
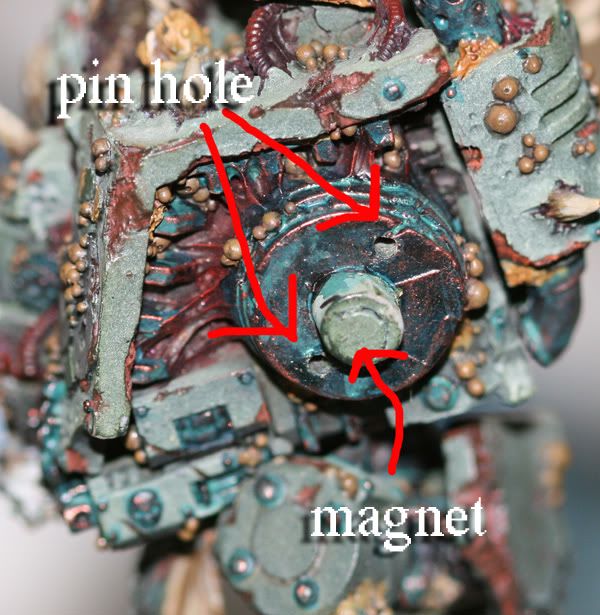
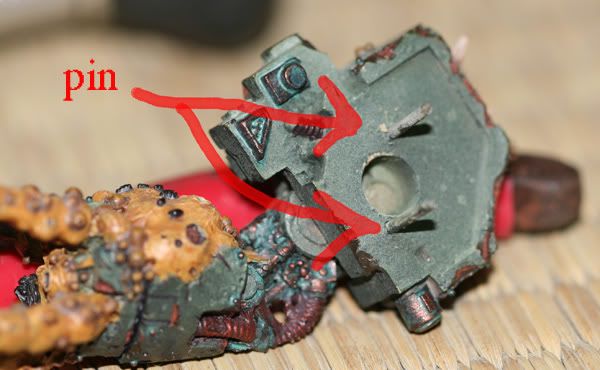
note: the model happens to have a male/female joint. This is not necessary for the technique. Also note, there is a magnet in the hole on the arm, you just cant see it.
et voila - a sturdy yet removable join for most anything Robert's yer muvver's bruvver
1) tools.
saw, knife, big drill (with elastoplast handle), small drill handle (there are 2 here. 1 is fine.) small drill bit (propped up on the drill handle), superglue, magnets.
magnets. The smaller chunky round ones are the ones I got from Rakuten. the bigger chunky ones I got at school, and the big flat ones I got from some 100yen shop butterfly decorations.
florists wire, bought from girly craft shop (sewing, knitting, and, crucially, flower arranging)
masks, if you intend to work with resin and/or an airbrush.
To get a really strong, yet removable join, (double-pin-magnet) do the following:
1) use a big drill, slightly larger in diameter than your magnets, to drill a hole in one of the parts to be joined. Right in the middle is best. Put a little blu-tac on the other part to be joined, wet the exposed side to avoid stickage, and press the two parts together as best you can. When you move em apart there should be a sticky-outy-bit in the blu-tac. Drill the partner hole here. Once both bits have had a hole drilled to the correct depth to fit the magnets, superglue a magnet in each hole. You'll find that this will hold a regular 28mm mini's arm, but will struggle to hold a big wing on something.
Onto stage 2:
2) about 3~4 mm from the magnet, drill a small hole to fit your regular pinning wire. e.g. a paperclip or florist's wire. Use the blu-tac technique to align and drill the partner hole. Now you have a hole and a magnet in each half of the join. Cut a piece of wire to fit, dry-fit it, and then glue it into one side only. Repeat step 2 for another wire/set of holes on the opposite side of the magnet (see pic). Make sure the pins are both in the same part.
note: the model happens to have a male/female joint. This is not necessary for the technique. Also note, there is a magnet in the hole on the arm, you just cant see it.
et voila - a sturdy yet removable join for most anything