Page 1 of 2
me in japan's nurgle stuff part 2 (2013~)
Posted: Sun May 12, 2013 2:04 pm
by me_in_japan
evenin' all

I already have a thread in the Hobby Log section for my nurgle marines, but it's been so long since I updated it it seemed sensible to start a new thread. If you want to see the older stuff, it's over
here.
So far, the only major additions to my nurgle marines this year are my bikers and my worms (spawn). In the works, I have a daemon prince, a hellbrute, a dark apostle, a warpsmith, typhus, a sorceror on a palanquin, and a whole passel of cultist zombies. All of these will be extensively converted except typhus (cos he's already pretty damn nurgly) and the daemon prince, who is an ace sculpt (The Old Death, from Enigma) and I don't wanna faff with it.
Anyway, without further ado, here are some pics of bikers:
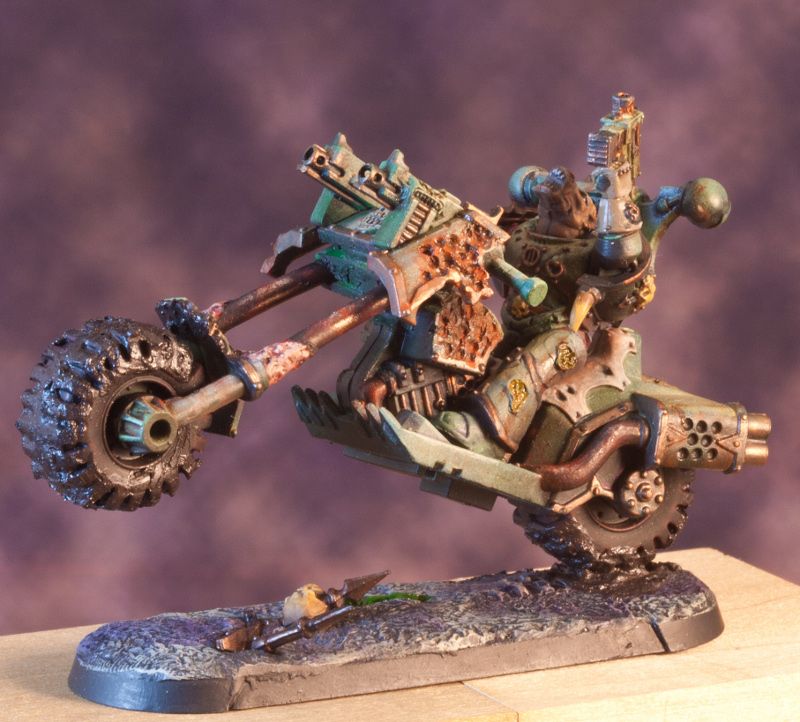
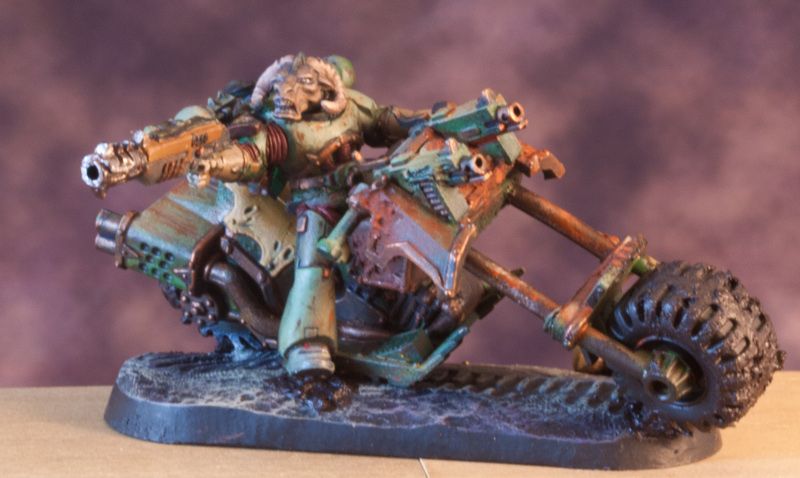
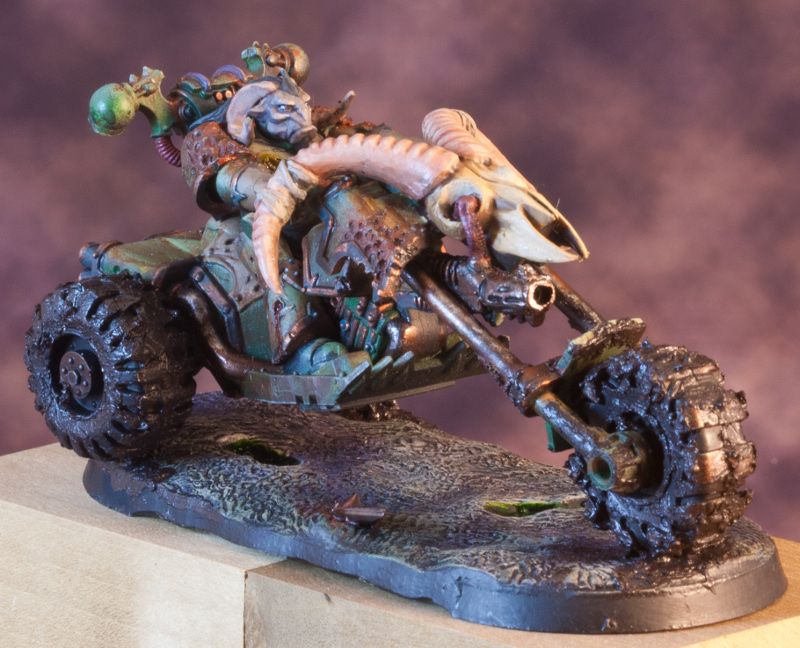
group shot
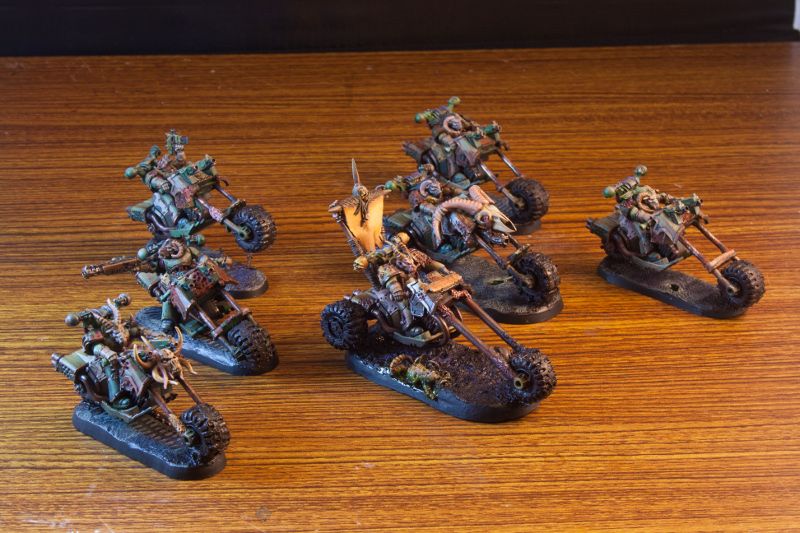
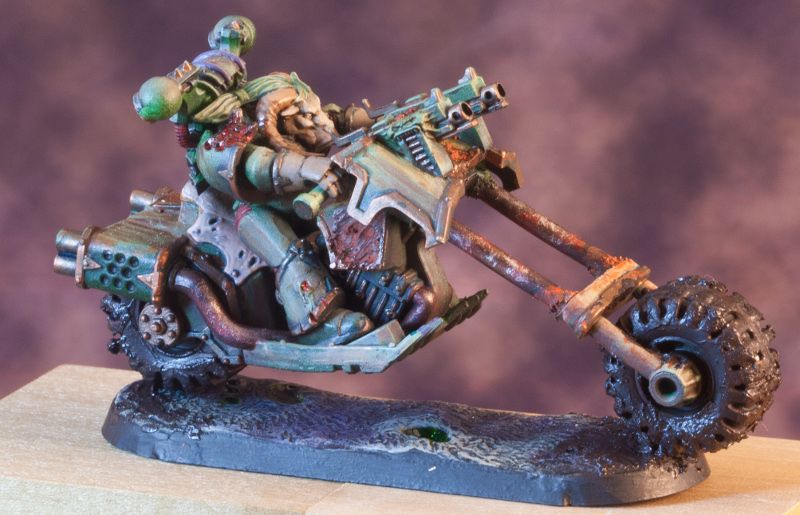
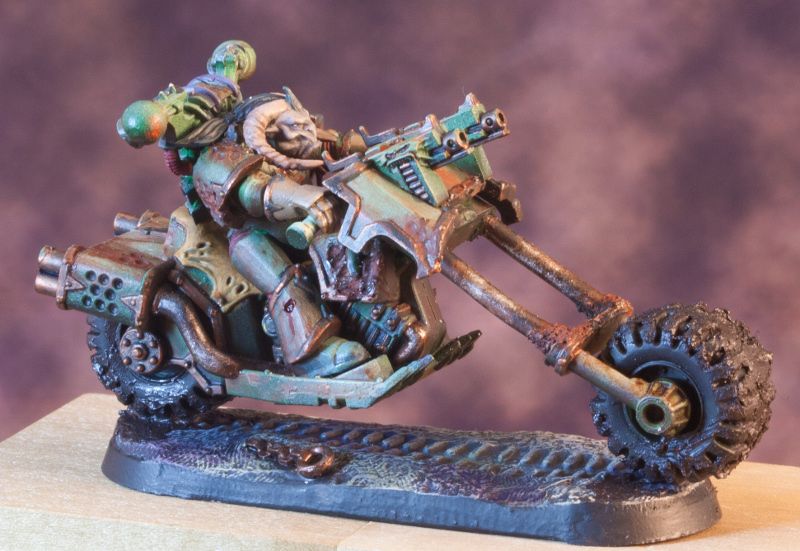
Bikers 1 through 6
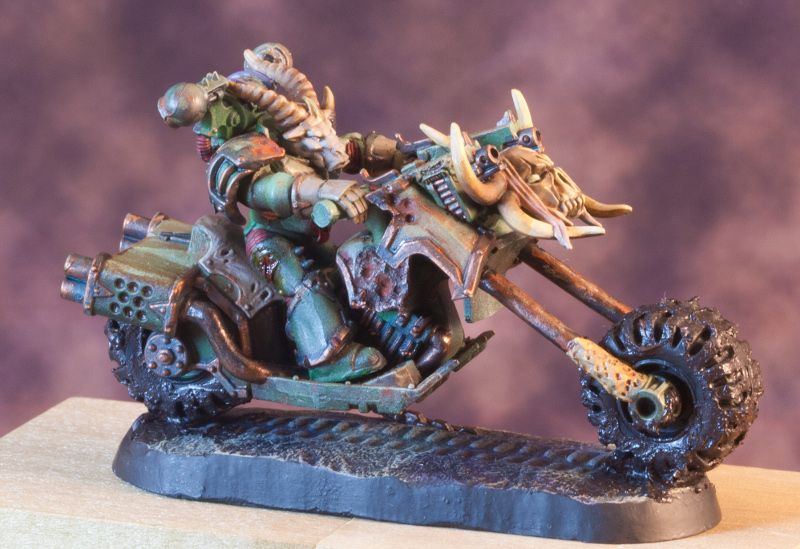
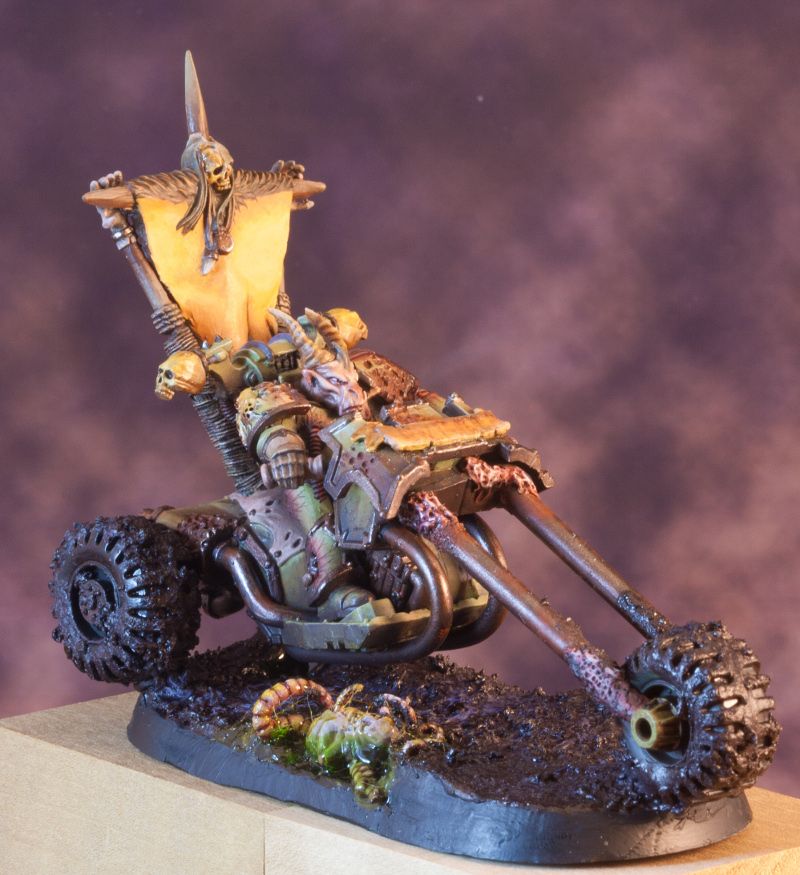
And the
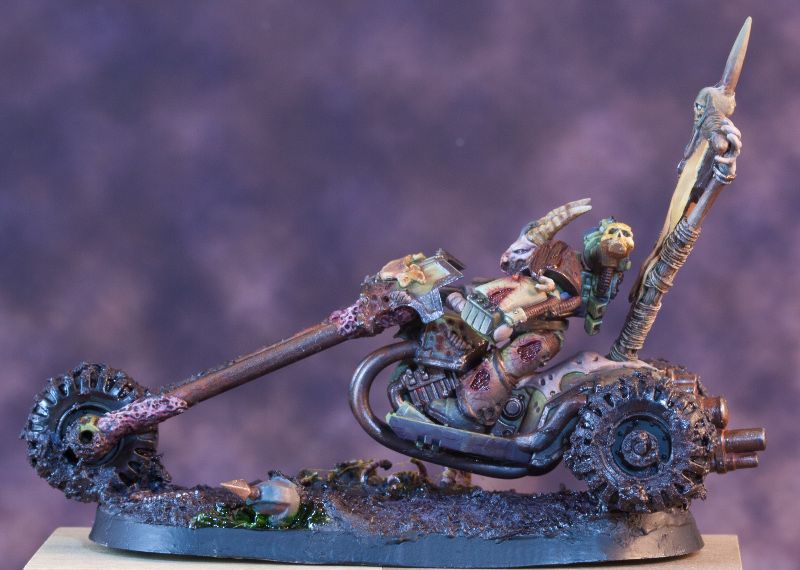
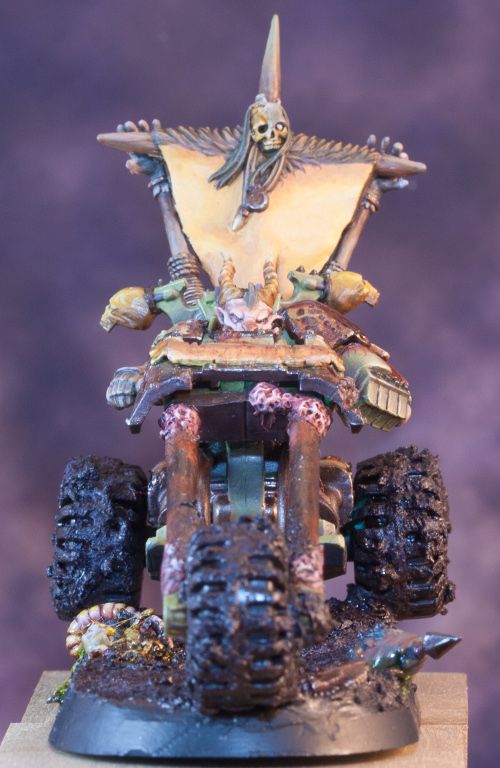
biker lord.
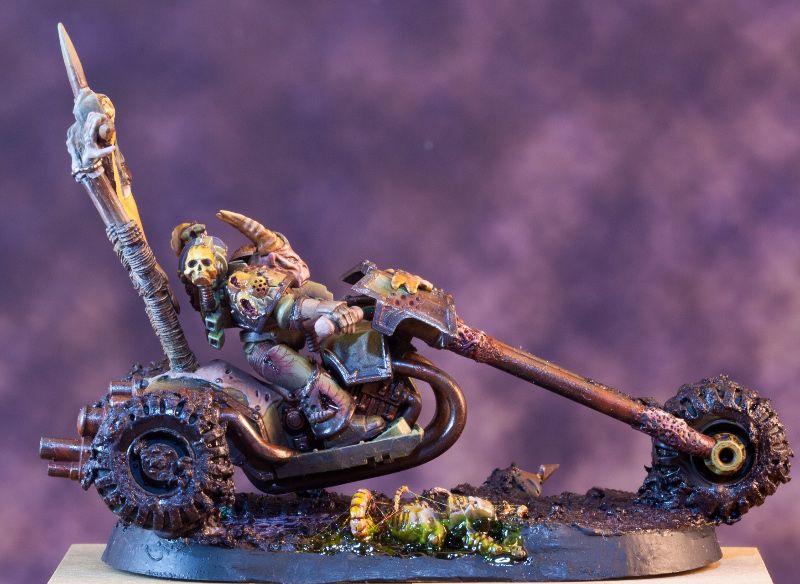
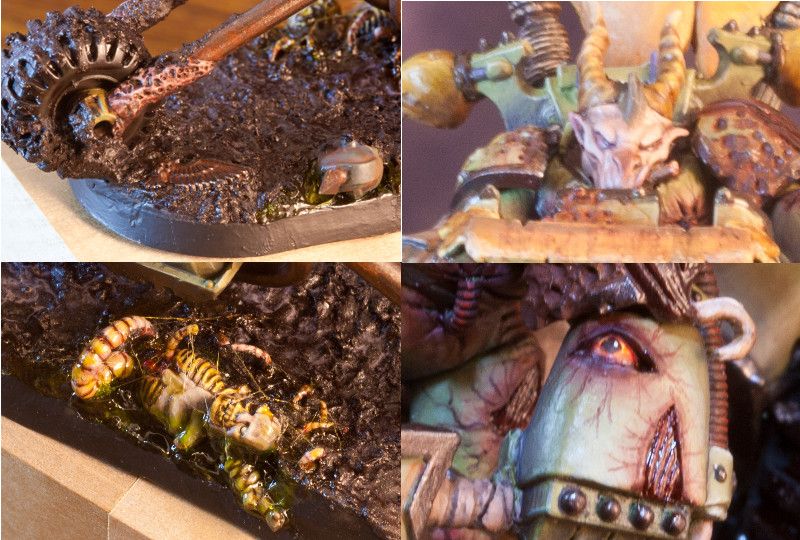
 some details
Re: me in japan's nurgle stuff part 2 (2013~)
Posted: Sun May 12, 2013 2:09 pm
by Admiral-Badruck
Nice.
Re: me in japan's nurgle stuff part 2 (2013~)
Posted: Sun May 12, 2013 2:22 pm
by Primarch
Very gribbly indeed.
Re: me in japan's nurgle stuff part 2 (2013~)
Posted: Sun May 12, 2013 2:56 pm
by kojibear
Awesome!!! Great work!!

Truly inspiring.

This is how CHIPS should have been


Re: me in japan's nurgle stuff part 2 (2013~)
Posted: Sun May 12, 2013 3:11 pm
by Primarch
My one criticism would be the banner on the lord. It's kinda plain. Maybe have the outline of a screaming face or something to liven it up a little?
Re: me in japan's nurgle stuff part 2 (2013~)
Posted: Sun May 12, 2013 10:18 pm
by me_in_japan
Primarch wrote:My one criticism would be the banner on the lord. It's kinda plain. Maybe have the outline of a screaming face or something to liven it up a little?
For sure - the banner (and the scroll on his bike) aren't actually finished yet. I always intended to do a design on it, but when I tried to do some freehand the night before Naghammer I discovered that it's a damn sight harder than I expected. There'll be a design on there eventually, once my painting ability catches up with my imagination
Re: me in japan's nurgle stuff part 2 (2013~)
Posted: Sun May 12, 2013 11:31 pm
by Konrad
Nice blending on the faces. The eyeball/shoulderplate is truly yucky. Always a pleasure to see a whole unit converted and painted to high standard.
I've converted my share of warbikes into choppers with extended front forks. It was a pain. Did you find an easy way to do it?
Re: me in japan's nurgle stuff part 2 (2013~)
Posted: Mon May 13, 2013 1:02 am
by me_in_japan
Dunno if I'd call it an easy way, but what I did was:
1)Stick everything together
2)Using a jeweller's saw, remove the front fairing from the main body of the bike just behind the handlebars but in front of the dials and gubbins in front of the rider. This is to accommodate the change in angle caused by lengthening the forks.
3)Cut off the forks just below the front canopy, where they join the main bodywork of the bike.
4)Separate the forks from the front mudguard/wheel assembly.
5)Drill out sockets in the front mudguard and main body to accept a big thick wire
6)Cut a piece of said big thick wire to fit. This involves a certain amount of blu tac and making sure the length is correct for the bike to fit on the base and not be canted too far back. The wire I use is from a 100yen shop, and is very soft, despite being about 4mm thick. The forks are just wire, no plastic, with the exception of the lord, who was a prototype and used thinner, stiffer wire, and plastic tubing for bulk. Anyway...
7) insert wire into sockets in main body and front mudguard. Glue, an hope it sticks. If it doesn't, slap some green stuff on it and pretend you were planning to put fungus there anyway
Paint...
Re: me in japan's nurgle stuff part 2 (2013~)
Posted: Mon May 13, 2013 3:25 am
by YellowStreak
Very nice work MiJ!
Re: me in japan's nurgle stuff part 2 (2013~)
Posted: Mon May 13, 2013 4:59 am
by Konrad
me_in_japan wrote:Dunno if I'd call it an easy way, but what I did was:
1)Stick everything together
2)Using a jeweller's saw, remove the front fairing from the main body of the bike just behind the handlebars but in front of the dials and gubbins in front of the rider. This is to accommodate the change in angle caused by lengthening the forks.
3)Cut off the forks just below the front canopy, where they join the main bodywork of the bike.
4)Separate the forks from the front mudguard/wheel assembly.
5)Drill out sockets in the front mudguard and main body to accept a big thick wire
6)Cut a piece of said big thick wire to fit. This involves a certain amount of blu tac and making sure the length is correct for the bike to fit on the base and not be canted too far back. The wire I use is from a 100yen shop, and is very soft, despite being about 4mm thick. The forks are just wire, no plastic, with the exception of the lord, who was a prototype and used thinner, stiffer wire, and plastic tubing for bulk. Anyway...
7) insert wire into sockets in main body and front mudguard. Glue, an hope it sticks. If it doesn't, slap some green stuff on it and pretend you were planning to put fungus there anyway
Paint...
Ah, fungus! That's the secret!
About how I did mine, but I used brass tubing. The plastic I was drilling into was not much thicker than the forks, so for my first couple I used thinner diameter tubing as a mounting and slid the thicker over the top. It was hard keeping things straight that way, so for the later ones, I just got a bigger drill bit and was really, really careful when drilling.