
Recent developments in the wide world of GW (or "the hobby" as they prefer to call themselves) has led to many people becoming rather disillusioned with them. I include myself in this category. I have spent literally thousands of pounds of my hard-earned, and thousands, possibly even tens of thousands of hours painting, prepping and converting their models. I love me my 40k.
However, GWs attitude to gamers, particularly experienced gamers and gamers overseas, has led me to lose all respect for them as a company. They dont care about me. Why should I care about them?
With this in mind, I decided that the time had come to try something I've had rolling around in my head for a wee while. To whit: casting my own models.
Now, I would like to point out that the casting is being done on an experimental basis. Yes, I intend to keep the models and play with them. No, I do not in any way intend to sell or distribute them to other people. Making a profit is not the point here. Seeing if it can be done, is.
So, here's what I did.
Step One: buy some mould making equipment.
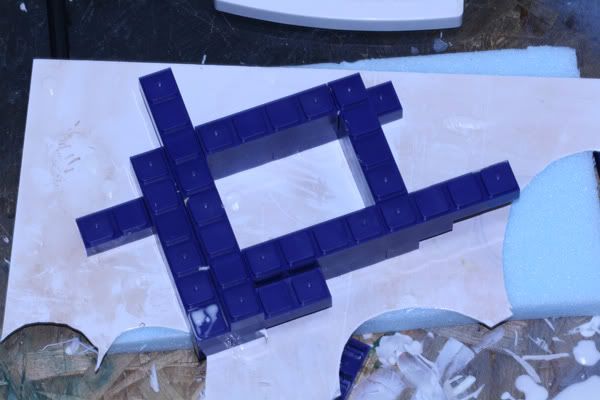
1) lego blocks (or cheap equivalent, as pictured.)
2) silicon rubber (and catalyst. It comes as a set)

This is a one litre tub.
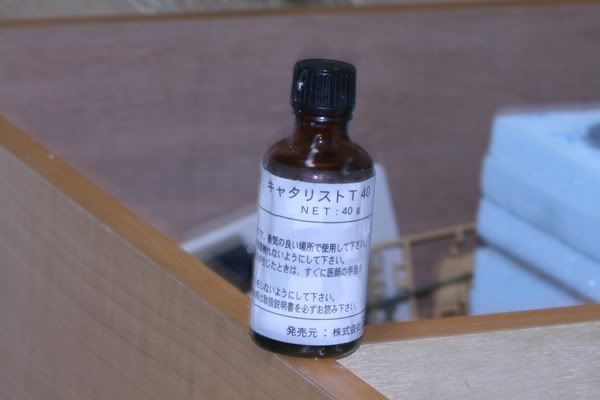
This is about 50ml.
3) resin. There are 2 cans like this in a set. Each is 1 litre.

4) a set of digital scales. These were nicked from my wife. (not advisable. Resin doesnt wash off. A placatory set had to be bought...

5) paper cups NOT plastic ones. (resin gets surprisingly hot while curing)

6) oil clay (known hereabouts as aburanendo. Fantastic stuff, and dead cheap, too. It never dries out.)

7) a mini. This can be self-sculped, for the halo-polishers among you
IMAGE REMOVED BY AUTHORITY OF THE INQUISITION
Note that the model chosen does not have any major sticky outy bits, and has a clearly defined front and back half.
OK. The procedure:
1) make a wee box with your lego. Fill this about half full with clay. Make sure to use a stick or something to shove it right into the corners. If you dont, all your silicon will come pissing out overnight and go all over the floor. Then it wil set. This is a Problem.

2) press your master mini into the clay about halfway.
IMAGE REMOVED BY AUTHORITY OF THE INQUISITION
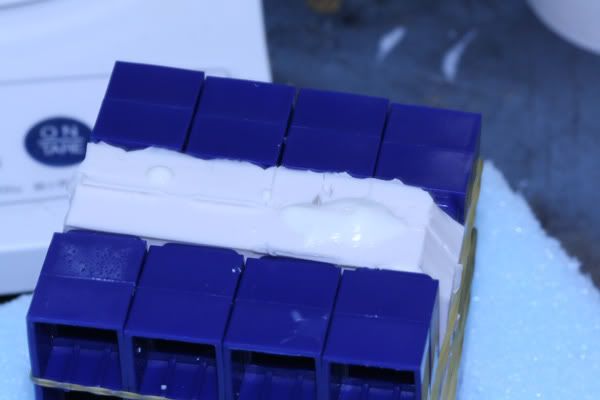
3) mix up your silicon and catalyst in the proportions in the instructions. (mine was 3% catalyst. So, for 33g of silicon, i measured 1 g of catalyst. This was enough for 1 model half.) Now, use a soon-to-be-dead paintbrush and paint this carefully over the exposed surface of the mini, making sure that there are no airbubbles. Once this is done, pour the rest of the silicon over the mini, to fill the mould. Take an electric toothbrush (or other vibrating home appliance. I leave this up to your imagination) and press it to the side of the mould for a coupla mins or until you get bored. This helps the bubbles percolate up. Now leave it to set for at least 24 hours.
(sorry, no pic of mould setting.)
4) remove the lego bricks. remove the clay (very easy, actually - it just peels off.) Now rebuild the lego in the same shape, turn the halfmould over, and put it back in. If youve got a decent silicon lube then now is the time to go to town on it. Now repeat the silicon application process (dab on with brush, pour on the rest to fill the mould. vibrate. wait 24 hrs.) If you have decent lube, the two halves should just pop apart. If, like me, it turns out that you dont, then you'll have to take a sharp knife and carefully cut through the mould, around the mini inside. This is not as tricky as it sounds, as the mould is pretty flexible, but hard to tear. You should end up with this.
IMAGE REMOVED BY JUNIOR ACOLYTE MIJ, ON REQUEST OF HIGH INQUISITOR PRIM THE PRIM.
You'll notice that there are a number of wedges that have been cut out of the mould. These are vents, and they are vital. basically, you need vents anywhere that resin is not flowing DOWN into. these places are where air bubbles get trapped. I tend to go a bit mad with em, and after casting my first piece, cut more wherever it looks like air was getting trapped.
5) strap your mould together with elastic bands (or just hold it with your fingers.)
Using the paper cups and the scales, mix your resin in as close to 50/50 proportions as you can. Do this by weight, not volume. Once mixed, pour it IMMEDIATELY, as thats when it starts to set. I cut a big vent to act as my intake.
0 seconds - like cooking oil
10 seconds - like fat in a cooling pan
30 seconds - like honey
45 secs - tar
1 min - not pourable
10 mins - fully cured. pop those moulds open!
6) open the mould. This is easily done with your fingers.
IMAGE REMOVED BY AUTHORITY OF THE INQUISITION
7) pop out the mini. This is where you find out if you had enough vents. First time around, you wont have, I promise you.
IMAGE REMOVED BY AUTHORITY OF THE INQUISITION
8) clean up the mini. Repeat until youre fully fed up with that model
IMAGE REMOVED BY AUTHORITY OF THE INQUISITION
And that's it, really.
My only caveat to the whole technique is: Its bloody messy, and the results are NOT as good as a shop bought mini. Absolutely useable, but I can see myself (fussy bugger that I am) spending a good long time filling air holes with putty. Still, I'm fairly happy with the results


